Crafting AI Music Video Narratives (2025 Guide)
Same song, three stories. Learn the templates + solo workflow (Udio → Lookbook → VEO/Sora → CapCut) that make AI music videos feel, not just flicker.
Make your visuals feel, not just flicker. Three story templates, real-world prompts, and a solo-friendly workflow.
Read time: ~7 min
Author: The AI Muse
Series: AI TALK
TL;DR
AI music videos don’t have to be random glitch soup. Start with the song’s emotional map, pick one of three narrative lanes (Abstract, Character, Conceptual), and build a lightweight lookbook → storyboard → shot list before you touch the timeline. This post gives you prompts, palettes, and edit tactics to go from “cool visuals” to a cohesive story.
🎥 Got a minute? This article pairs with our upcoming tutorial video. When it drops, we’ll embed it here.
What you’ll learn
- How to translate an Udio track into a clear visual arc
- Three repeatable narrative templates you can use on any song
- A budget workflow using NightCafe, VEO 3.1 / Sora, CapCut, Maschine, and Canva
- Prompts, palettes, and pacing that create emotional payoff
Why story beats spectacle
Cool visuals hit your eyes. Story hits your chest. The difference is intention: motifs that return, colors that evolve, and cuts that land on phrasing instead of every single beat. We’ll map the music, choose a lane, and give those visuals a job.
Step 1: Decode the audio (find the song’s soul)
- Tap tempo and mark sections: intro → A → B → chorus → bridge → outro.
- Emotional map: pick 2–3 feelings across the song (e.g., longing → lift → release).
- Motifs: choose one visual element to bring back on each chorus (ring, ripple, reflection, etc.).
Quick worksheet
- Tempo:
___ BPM - Section marks (timecodes):
Intro ___ | A ___ | B ___ | Chorus ___ | Bridge ___ | Outro ___ - Emotions:
___ → ___ → ___ - Motif:
___
Pro tip: Hold the “resolve” shot 1–2 frames longer than feels safe. That breath is the feeling.
Step 2: Choose your narrative lane
Pick one lane and commit. All three work—the lane just decides how you organize visuals.
1) Abstract Montage (emotion-first)
Palette: Electric teal • Neon coral • Deep plum
Shots: liquid ink spreads, prism bursts, slow cloth sims, particle swells on downbeats
Motif: a rotating halo ring that evolves each chorus
Text: 1–2 lyric fragments as translucent title cards (60–80% opacity)
Prompt starter:
neon liquid ink in water, macro, cinematic edge lighting, slow drift, teal/coral/plum palette, 24fps motion blur, soft film grain, subtle vignette 10%
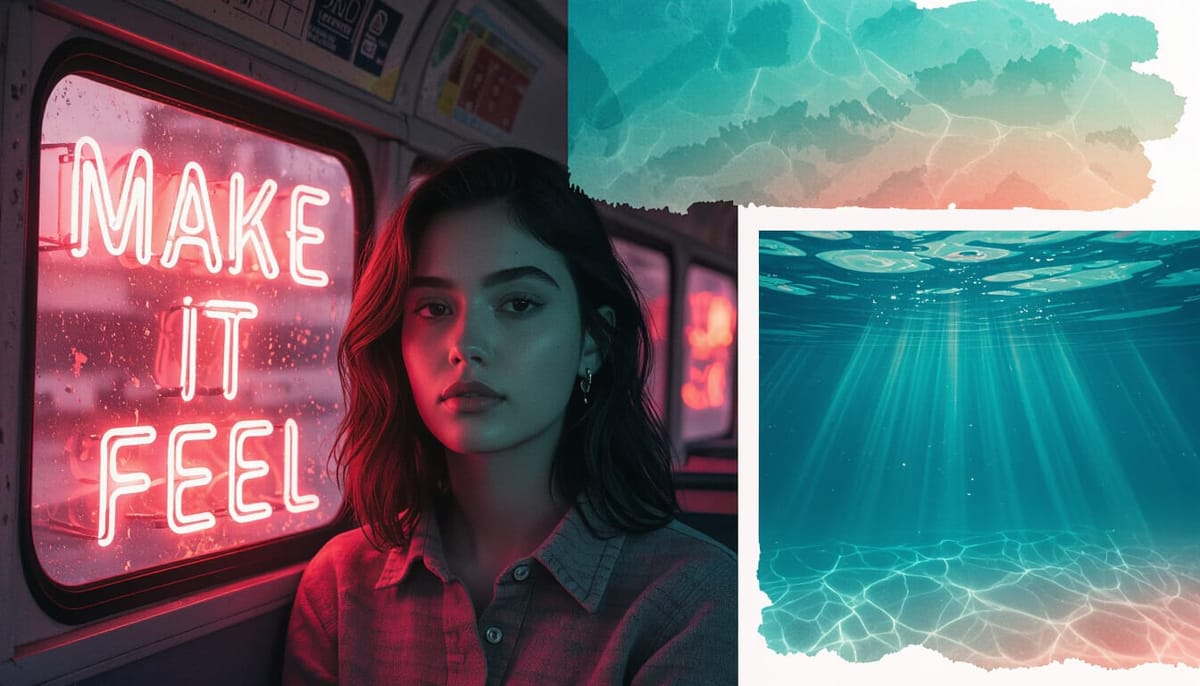
2) Character Micro-Arc (relatable story)
Palette: Golden-hour amber • Cyan night • Desaturated mids
Beat sheet:
- Intro: character on a bus window (reflection motif)
- Verse A: missed call • shoe close-up walking • skyline parallax
- Chorus: sprint + light leaks • decision moment
- Bridge: stillness, breathe, city lights bokeh
- Final chorus: back to the window—but changed
Prompt starter:
late-night city bus interior, window reflections, moody cyan, handheld micro-jitters, shallow depth, gentle film grain, urban glow
3) Conceptual Essay (idea-driven)
Core concept: Memory = water
Palette: Cerulean • Milk white • Graphite
Visuals: ripples, submerged Polaroids, glass refractions, rain-on-glass transitions
Motif cadence: ripple at section changes; droplets on hi-hats
Prompt starter:
floating photographs under clear water, sunshafts, serene minimalism, clean negative space for typography, soft refraction
Step 3: Build a lookbook + lightweight storyboard
Use Canva to make a 9-tile board—three tiles per section (A/B/Chorus). Label each with the emotion + an action verb.
Template grid
[ A1 – "longing" – drift ] [ A2 – "reach" – pan ] [ A3 – "tension" – hold ]
[ B1 – "lift" – rise   ] [ B2 – "push" – zoom ] [ B3 – "break" – cut ]
[ C1 – "release" – glow] [ C2 – "echo" – repeat motif ] [ C3 – "resolve" – breathe ]
Keep a small corner tag like AI Muse for brand consistency.
Step 4: Generate wisely (shots, then variations)
- Start from the storyboard → request specific shots, not vibes.
- For each shot, make 1–2 controlled variations (angle, focal length, speed).
- Build a B‑roll bank by emotion (e.g., wistful, hype, serene). It saves you mid-edit.
Solo-friendly tools
- Udio (track), NightCafe (stills/textures), VEO 3.1 / Sora (hero shots), CapCut (edit), Maschine (extra percs), Canva (lookbook & thumbnail)
Step 5: Edit for feeling (CapCut tactics)
- Cut on phrasing, not every beat; nudge ±1–2 frames to match breath.
- Chorus: bring back your motif and bump saturation +10.
- Micro‑transitions: use 6–8f whips or cross‑zooms only at section turns.
- Type: one family—bold condensed for titles, light for captions.
- Glue: add film grain (size 8–12%, intensity 10–15%).
Step 6: Polish & publish
- Color pass for unity; add a subtle texture layer at 10–20%.
- Export and prep metadata: title, description, tags, chapters.
- Upload to playlists: Tutorials, Narrative Lab, Behind the Beat.
- Post 2 Shorts in 48h to funnel views.
Want our NotebookLM workflow that keeps all these pieces talking to each other? DM For:⚡ NotebookLM Content Workflow (AI Muse Edition).pdf)
Credits
Created by The AI Muse. Tools used: Udio, NightCafe, VEO 3.1, Sora, CapCut, Maschine, Canva.
Questions or collab ideas? DM us—low‑effort collabs welcome (you gift a hero shot, we score a 20s reel, we both post).